Spooky Cute Ghost Mini Cake
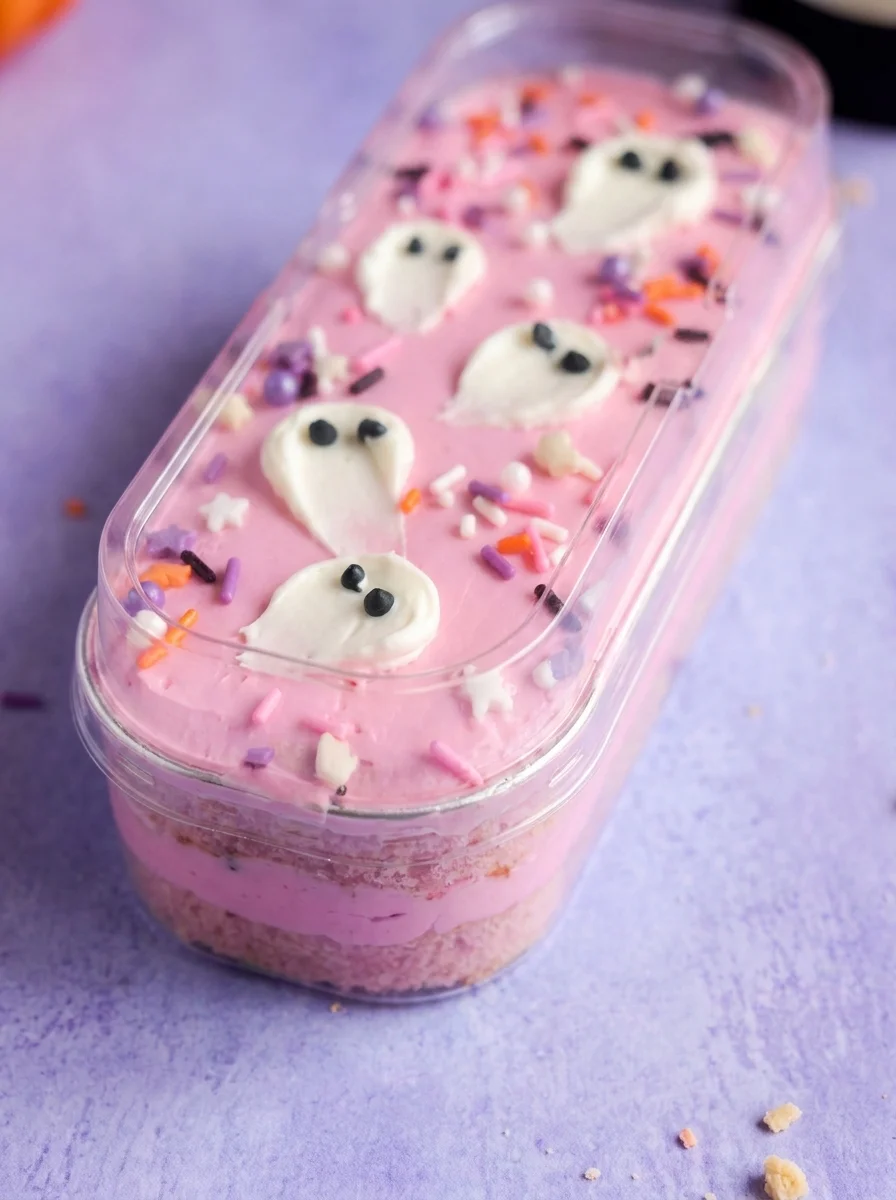
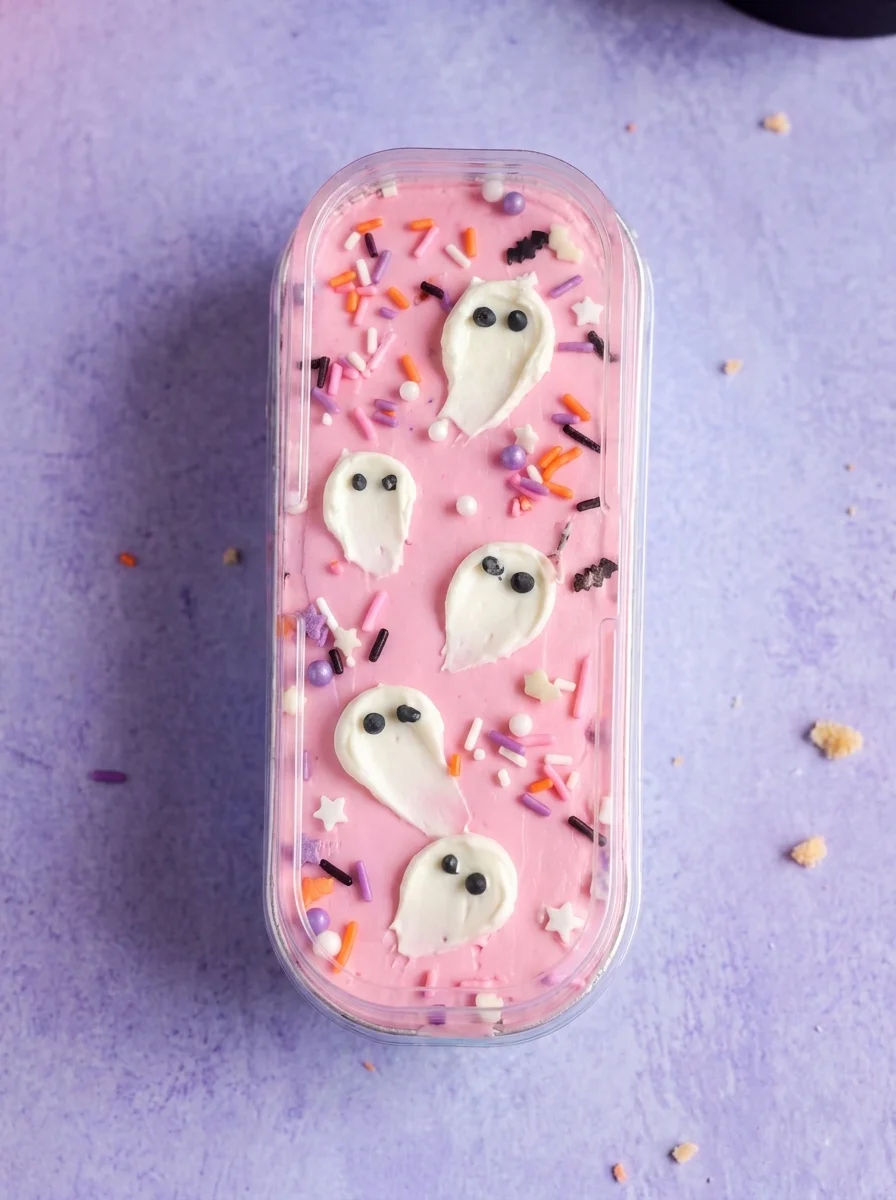
This Spooky Cute Ghost Mini Cake is a delightful treat perfect for Halloween gatherings. With its charming ghost decorations and vibrant colors, it’s sure to bring smiles to both kids and adults alike. Whether you’re hosting a party, attending a potluck, or just want to indulge in a festive dessert at home, this mini cake offers fun and flavor in every bite. Its individual servings make it convenient and appealing for everyone!
Why You’ll Love This Recipe
- Adorable Presentation: The cute ghost designs make this cake visually appealing, perfect for Halloween.
- Kid-Friendly Fun: Easy to assemble, making it a great baking project for kids to join in on the fun.
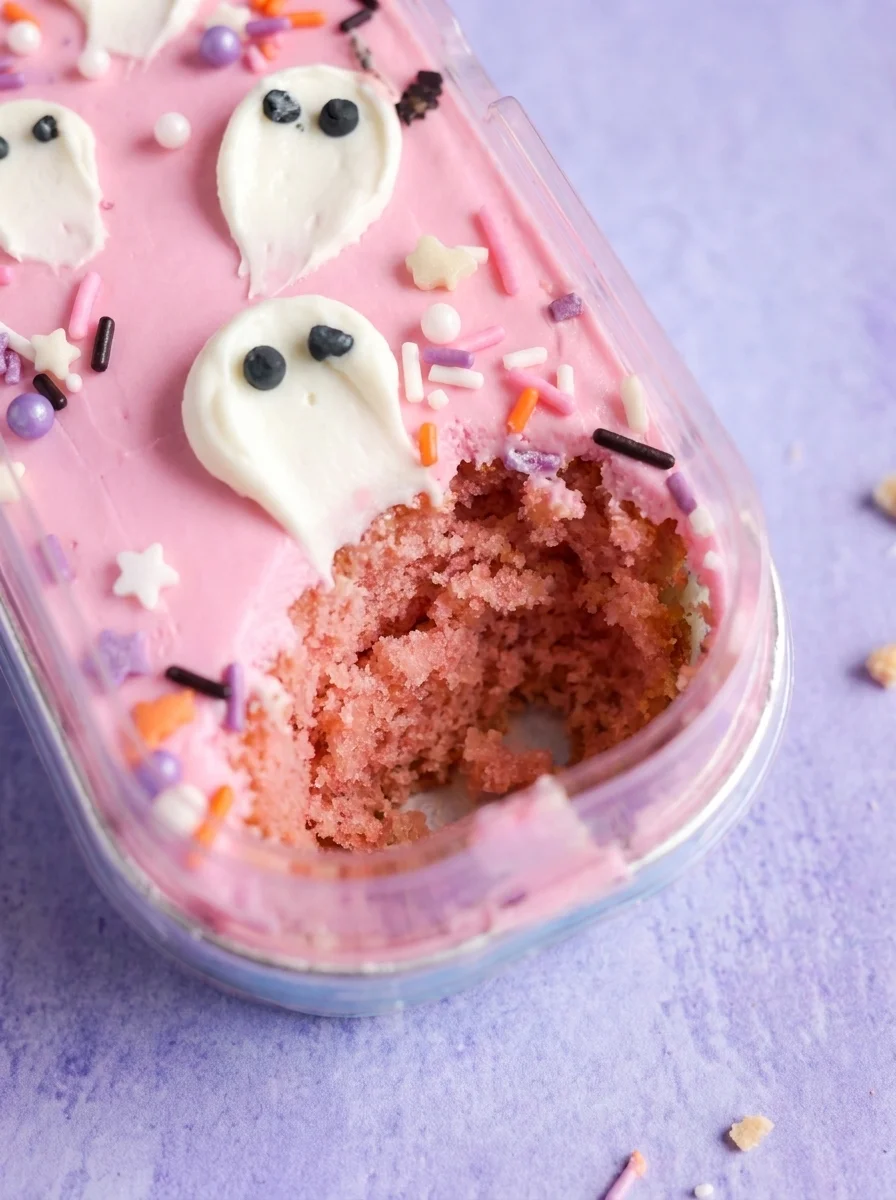
- Delicious Flavor: The soft vanilla cake combined with pink frosting creates a sweet and satisfying dessert.
- Versatile Serving: Ideal for parties, gatherings, or as a festive treat for family celebrations.
- Easy to Customize: Feel free to change the colors or decorations based on your theme for added creativity.
Tools and Preparation
To create your Spooky Cute Ghost Mini Cake, you will need some essential tools. Having the right equipment makes the process smoother and more enjoyable.
Essential Tools and Equipment
- Electric mixer
- Mixing bowls (medium and large)
- 8×8 inch baking pan
- Piping bags or Ziploc bags
- Clear plastic containers
Importance of Each Tool
- Electric mixer: Ensures your batter is well-mixed and fluffy without much effort.
- Mixing bowls: Having multiple bowls allows you to separate ingredients easily during preparation.
- Piping bags: Perfect for creating adorable ghost shapes with precision.
Ingredients
For the Vanilla Cake:
- 1 1/2 cups all-purpose flour
- 1 1/2 teaspoons baking powder
- 1/4 teaspoon salt
- 1/2 cup (1 stick) unsalted butter, softened
- 1 cup granulated sugar
- 2 large eggs
- 1 teaspoon vanilla extract
- 1/2 cup milk
For the Pink Frosting:
- 1/2 cup (1 stick) unsalted butter, softened
- 2 cups powdered sugar
- 1 tablespoon milk
- 1/2 teaspoon vanilla extract
- 2-3 drops pink food coloring gel
For the White Ghost Frosting:
- 1/4 cup (1/2 stick) unsalted butter, softened
- 1 cup powdered sugar
- 1/2 tablespoon milk
- 1/4 teaspoon vanilla extract
For Decoration:
- 1/4 cup Halloween sprinkles (various shapes and colors)
- 10-12 black edible pearls (or small black sugar decorations) for ghost eyes
How to Make Spooky Cute Ghost Mini Cake
Step 1: Preheat the Oven
Preheat your oven to 350°F. Grease and flour an 8×8 inch baking pan.
Step 2: Mix Dry Ingredients
In a medium bowl, whisk together the all-purpose flour, baking powder, and salt. Set aside.
Step 3: Cream Butter and Sugar
In a large bowl, using an electric mixer, cream together the softened unsalted butter and granulated sugar until light and fluffy. Beat in the eggs one at a time, then stir in the vanilla extract.
Step 4: Combine Wet and Dry Ingredients
Gradually add the dry ingredients to the wet ingredients while alternating with the milk. Start and end with dry ingredients. Mix until just combined; avoid overmixing.
Step 5: Bake the Cake
Pour the cake batter into your prepared pan. Spread evenly and bake for 25-30 minutes or until a wooden skewer inserted into the center comes out clean. Let cool completely on a wire rack.
Step 6: Cut Cake into Portions
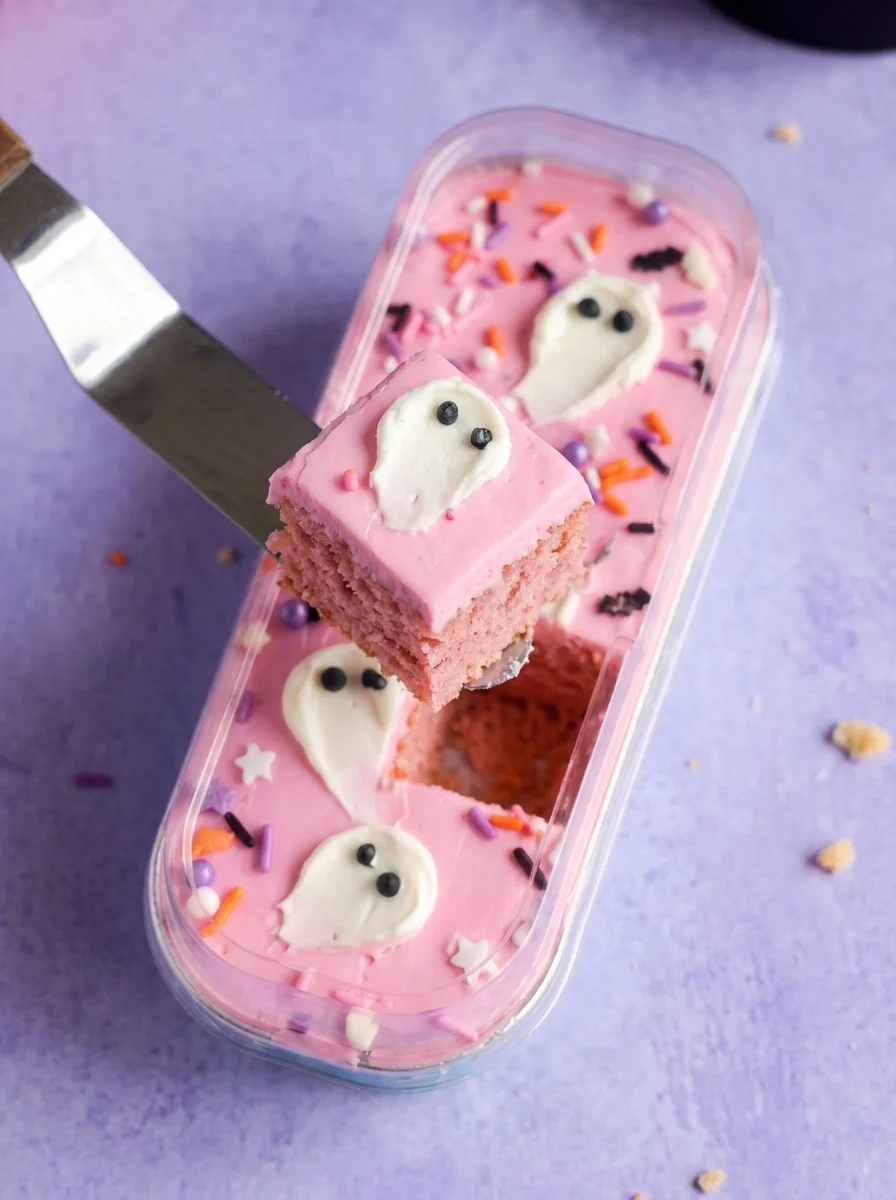
Once cooled, carefully remove from pan and cut into six equal rectangular portions that fit your clear plastic containers.
Step 7: Prepare Pink Frosting
In a clean large bowl, beat softened unsalted butter until creamy using an electric mixer. Gradually add powdered sugar, milk, and vanilla extract until smooth. Mix in pink food coloring gel until uniformly colored.
Step 8: Prepare White Ghost Frosting
In a small bowl, beat softened unsalted butter until creamy. Gradually add powdered sugar, milk, and vanilla extract until smooth. Transfer this white frosting into a piping bag fitted with a small round tip or snip off a corner of a Ziploc bag.
Step 9: Assemble Mini Cakes
Place one rectangular cake portion into each clear plastic container. Spread an even layer of pink frosting over each cake portion.
Step 10: Decorate with Sprinkles
Generously scatter Halloween sprinkles over the pink frosting on each mini cake.
Step 11: Pipe Ghosts
Using the piping bag with white frosting, pipe small ghost shapes onto each mini cake’s pink frosting. For each ghost shape, pipe a small blob then gently pull down to create a tail. Add two black edible pearls for eyes.
Step 12: Serve or Store
Serve immediately or cover tightly and refrigerate until you’re ready to enjoy these spooky treats!
How to Serve Spooky Cute Ghost Mini Cake
Serving your Spooky Cute Ghost Mini Cake can be a delightful experience. These mini cakes are perfect for Halloween gatherings, kids’ parties, or as a fun treat for any occasion. Here are some creative serving suggestions to make the most of these adorable treats.
Individual Treat Boxes
- Create treat boxes for each guest using small clear plastic containers. This makes it easy for everyone to enjoy their mini cake while minimizing mess.
Halloween Dessert Table
- Place the mini cakes on a festive dessert table alongside other Halloween-themed goodies. Use spooky decorations like spider webs or plastic spiders to enhance the theme.
Party Favors
- Wrap each mini cake in clear cellophane and tie with a colorful ribbon. These make charming party favors that guests will love taking home.
Themed Plates and Napkins
- Serve the mini cakes on themed plates and napkins featuring ghosts or pumpkins. This adds an extra layer of fun to your presentation.
Accompanied by Hot Beverages
- Pair these mini cakes with hot chocolate or apple cider for a cozy fall treat that complements the spooky theme perfectly.
Creative Toppers
- Add additional toppers like edible glitter or fondant decorations to enhance the visual appeal of each mini cake. This makes them even more eye-catching!
How to Perfect Spooky Cute Ghost Mini Cake
To ensure your Spooky Cute Ghost Mini Cake turns out perfectly every time, keep these tips in mind.
- Measure Ingredients Accurately: Using precise measurements helps achieve the right texture and flavor in your cake.
- Don’t Overmix Batter: Mix until just combined to avoid a dense cake; overmixing can lead to tough results.
- Cool Completely Before Frosting: Allow the cake to cool completely before applying frosting to prevent melting and sliding.
- Use Room Temperature Ingredients: Bring butter and eggs to room temperature for better mixing and smoother batter.
- Experiment with Colors: Feel free to adjust the food coloring in the frosting for a more vibrant look or different shades.
- Store Properly: Keep leftovers in an airtight container in the refrigerator to maintain freshness for up to three days.
Best Side Dishes for Spooky Cute Ghost Mini Cake
To complement your Spooky Cute Ghost Mini Cake, consider adding some delicious side dishes. These options will enhance your dessert spread while keeping with the festive theme.
- Pumpkin Soup – A warm, creamy pumpkin soup serves as a comforting addition that echoes fall flavors beautifully.
- Mummy Hot Dogs – Wrap hot dogs in crescent dough strips and bake until golden. They make fun finger foods that kids will adore.
- Witch’s Brew Punch – A fruity punch with floating fruit slices creates an inviting drink option that refreshes guests.
- Spooky Cheese Platter – Include cheeses shaped like bats and ghosts along with crackers and fruits for an elegant touch.
- Candy Corn Fruit Cups – Layer orange, yellow, and white fruits in cups resembling candy corn, offering a healthy yet festive snack.
- Frankenstein Veggie Tray – Arrange vegetables creatively into Frankenstein faces, served with a dip for an interactive appetizer.
- Ghostly Deviled Eggs – Make deviled eggs with spooky faces drawn on top using olives or hot sauce for an eerie twist on a classic dish.
- Caramel Apple Slices – Serve sliced apples drizzled with caramel sauce as a sweet treat that pairs well with dessert flavors.
Common Mistakes to Avoid
Making the Spooky Cute Ghost Mini Cake can be a delightful experience, but it’s easy to overlook some important steps. Here are common mistakes to avoid.
- Skipping ingredient measurements: Accurate measurements are crucial for baking success. Always use measuring cups and spoons to ensure the right proportions.
- Overmixing the batter: Mixing too much can lead to dense cakes. Mix until just combined for a light and fluffy texture.
- Not cooling the cake properly: Allowing the cake to cool completely is essential before frosting. This prevents melting and ensures better decoration.
- Ignoring frosting consistency: If your frosting is too thick or too runny, adjust with milk or powdered sugar. The right consistency helps achieve smooth application.
- Neglecting decoration details: Details like ghost eyes can make your mini cakes shine. Take time to pipe them neatly for an adorable finish.
Storage & Reheating Instructions
Refrigerator Storage
- item: Store the mini cakes in airtight containers.
- item: Keep them in the refrigerator for up to 3 days.
Freezing Spooky Cute Ghost Mini Cake
- item: Wrap each mini cake individually in plastic wrap.
- item: Place wrapped cakes in a freezer-safe bag or container for up to 1 month.
Reheating Spooky Cute Ghost Mini Cake
- Oven: Preheat your oven to 350°F and heat for about 10 minutes until warm.
- Microwave: Heat each mini cake for about 15-20 seconds on medium power, checking frequently.
- Stovetop: Place on a skillet over low heat, cover, and warm for approximately 5 minutes.
Frequently Asked Questions
What makes the Spooky Cute Ghost Mini Cake special?
The Spooky Cute Ghost Mini Cake stands out due to its adorable ghost decorations and vibrant pink frosting, making it perfect for Halloween festivities.
Can I customize the flavors of the mini cake?
Absolutely! You can experiment with different extracts like almond or add cocoa powder for a chocolate version of the cake.
How do I make sure my ghosts look cute?
Using a piping bag allows for better control when creating ghost shapes. Practice makes perfect!
Can I make this recipe ahead of time?
Yes! You can prepare the cakes and frostings in advance. Assemble just before serving to keep everything fresh.
What should I do if my frosting is too runny?
If your frosting is too runny, gradually mix in more powdered sugar until you reach your desired consistency.
Final Thoughts
The Spooky Cute Ghost Mini Cake is an enchanting treat that brings joy to any Halloween gathering. Its versatility allows you to customize flavors and decorations readily. Don’t hesitate to get creative with this delicious recipe—your party guests will love these charming little cakes!
Spooky Cute Ghost Mini Cake
- Total Time: 1 hour 5 minutes
- Yield: 6 mini cakes 1x
Description
Spooky Cute Ghost Mini Cakes are the perfect addition to your Halloween festivities! These delightful individual cakes feature layers of fluffy vanilla cake topped with vibrant pink frosting. Each mini cake is adorned with playful Halloween sprinkles and charming piped ghost decorations, making them a hit for both kids and adults. Easy to assemble in clear plastic containers, these treats not only look festive but are also fun to eat. Whether you’re hosting a Halloween party or looking for a creative dessert idea, these mini cakes will add a touch of sweetness and spookiness to your celebration.
Ingredients
- 1 1/2 cups all-purpose flour
- 1 1/2 teaspoons baking powder
- 1/4 teaspoon salt
- 1/2 cup (1 stick) unsalted butter, softened
- 1 cup granulated sugar
- 2 large eggs
- 1 teaspoon vanilla extract
- 1/2 cup milk
- 1/2 cup (1 stick) unsalted butter, softened
- 2 cups powdered sugar
- 1 tablespoon milk
- 1/2 teaspoon vanilla extract
- 2–3 drops pink food coloring gel
- 1/4 cup (1/2 stick) unsalted butter, softened
- 1 cup powdered sugar
- 1/2 tablespoon milk
- 1/4 teaspoon vanilla extract
- 1/4 cup Halloween sprinkles (various shapes and colors)
- 10–12 black edible pearls (or small black sugar decorations) for ghost eyes
Instructions
- Preheat oven to 350°F and grease an 8×8 inch baking pan. Whisk flour, baking powder, and salt in a bowl.
- In another bowl, cream butter and sugar until fluffy. Add eggs one at a time and stir in vanilla.
- Gradually mix in dry ingredients alternating with milk until smooth.
- Pour batter into the prepared pan and bake for 25-30 minutes until cooked through. Cool completely before cutting into six equal portions.
- For pink frosting: Beat butter, gradually add powdered sugar, milk, vanilla, and pink food coloring until fluffy.
- For white ghost frosting: Repeat the process using the ingredients for white frosting.
- Assemble each mini cake by layering cake in containers, topping with pink frosting, sprinkles, and piping ghost decorations with white frosting.
- Prep Time: 40 minutes
- Cook Time: 25 minutes
- Category: Dessert
- Method: Baking
- Cuisine: American
Nutrition
- Serving Size: 1 mini cake (90g)
- Calories: 265
- Sugar: 26g
- Sodium: 150mg
- Fat: 11g
- Saturated Fat: 7g
- Unsaturated Fat: 3g
- Trans Fat: 0g
- Carbohydrates: 40g
- Fiber: 0g
- Protein: 3g
- Cholesterol: 35mg